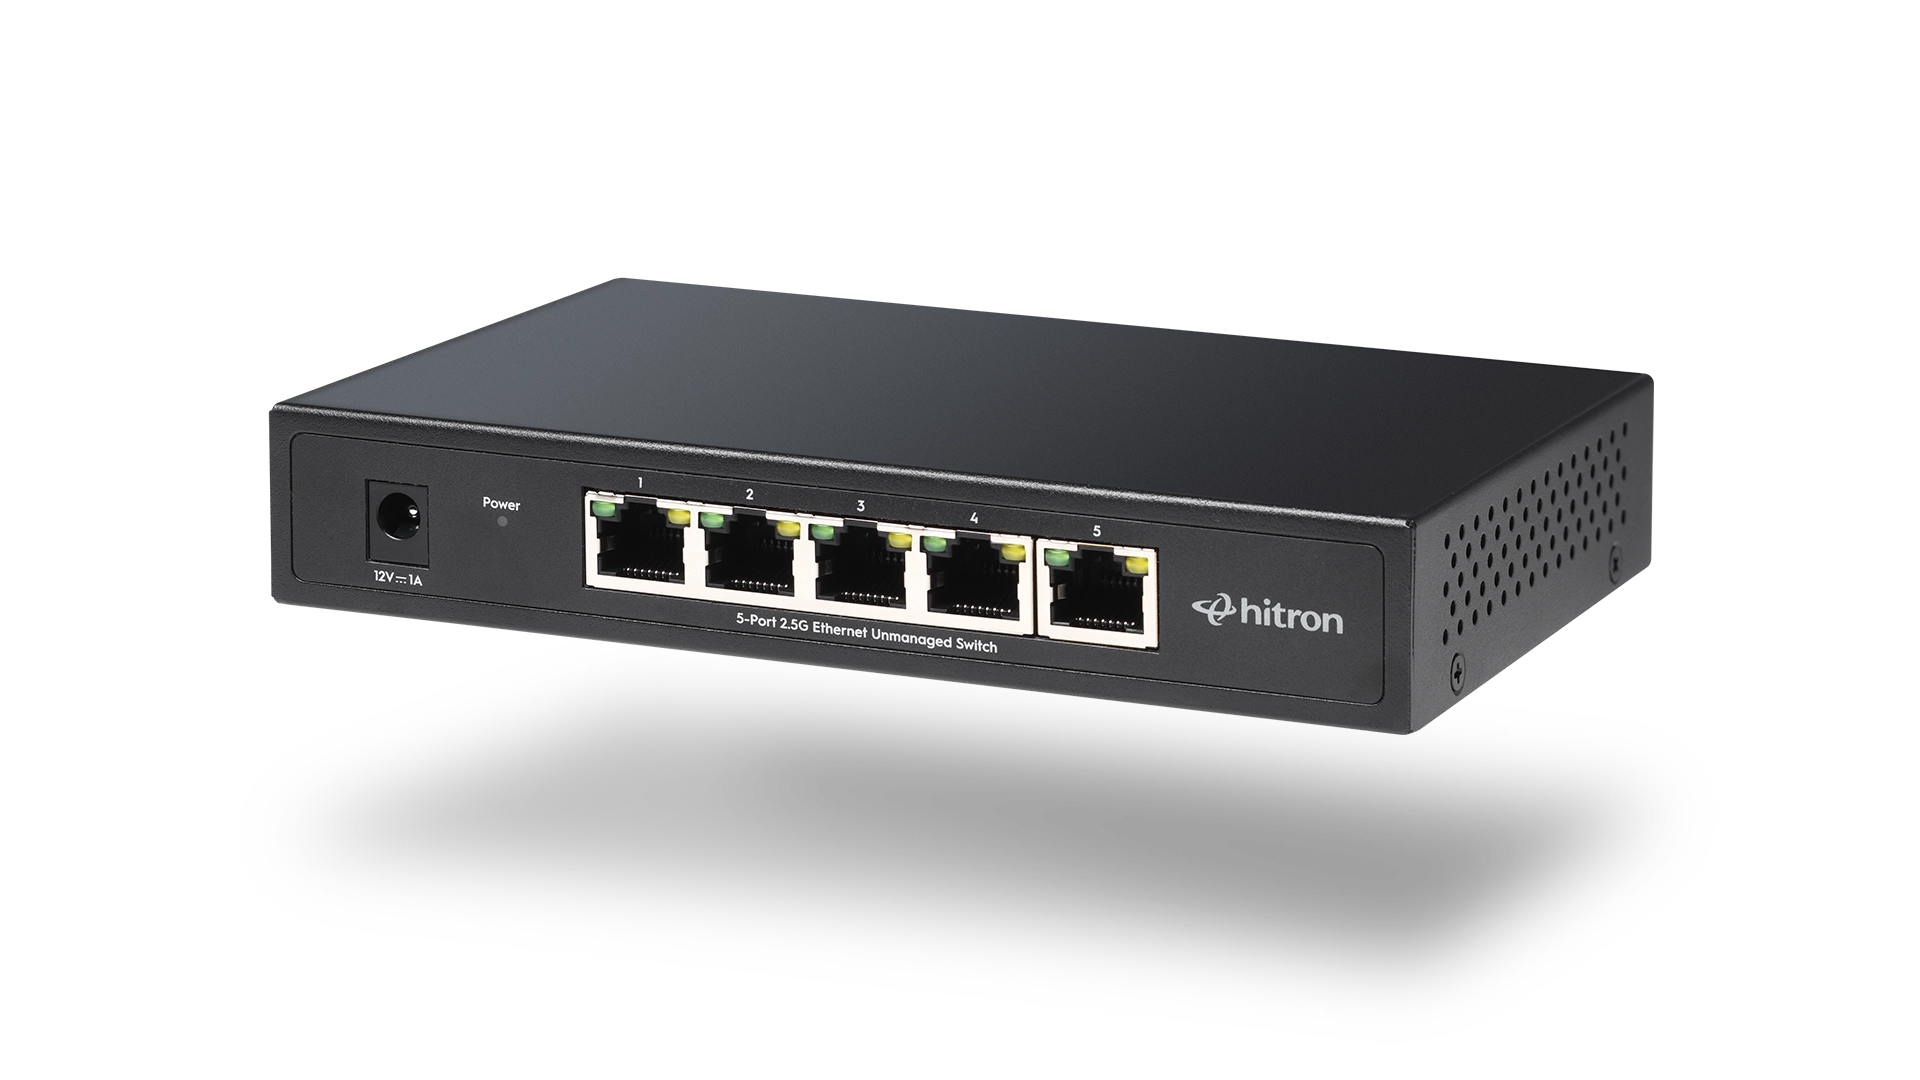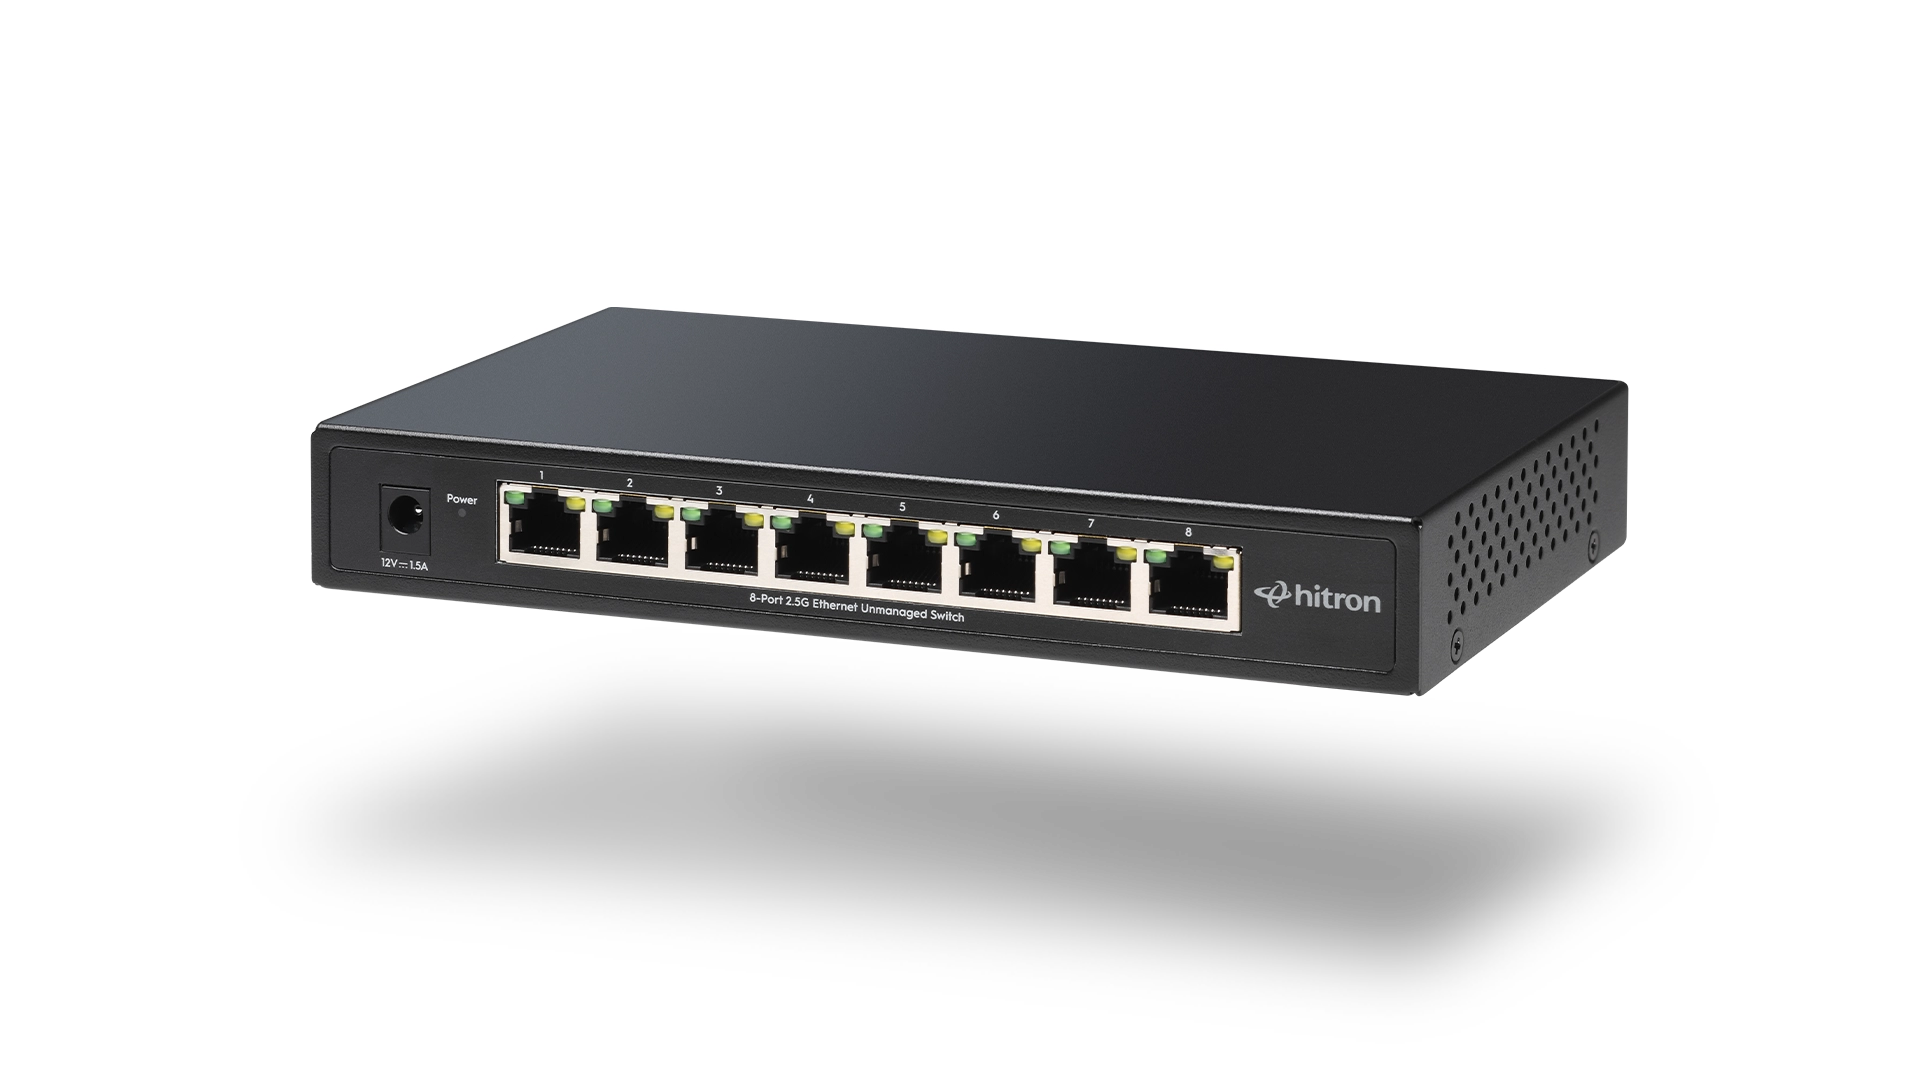
Installing an Ethernet switch is one of the simplest and most effective ways to expand your home network. In most homes, installation takes less than 10 minutes and requires no software, configuration, or networking experience. Simply connect the Ethernet switch to your router with an Ethernet cable, plug in your wired devices, and the switch automatically begins directing network traffic.
Whether you’re adding more Ethernet ports to your router, creating a faster connection for gaming, or preparing your home for future network upgrades, this guide will walk you through the entire installation process.
If you’re new to Ethernet switches, we recommend first reading What Is an Ethernet Switch and How Does It Work? That guide explains how Ethernet switches intelligently direct data between devices. This article focuses on the next step: planning, installing, and getting the most from your Ethernet switch.
Before You Install an Ethernet Switch:
Connecting an Ethernet switch is easy, but spending a few minutes planning your installation can make your home network cleaner, easier to expand, and simpler to troubleshoot in the future:
Step 1: Choose the Best Location
Many people assume an Ethernet switch must sit directly beside the router. While that’s often the simplest option, it isn’t the only one.
The best location depends on where your wired devices are located.
Common installation locations include:
- Home office
- Entertainment center
- Basement network cabinet
- Structured wiring panel
- Utility room
- Media cabinet
- Server rack
Ideally, your switch should be located where several Ethernet cables naturally come together. This reduces cable clutter and makes it easier to add new devices later.
If your router is located in one room but most of your wired devices are somewhere else, installing the switch closer to those devices may actually reduce the total amount of cabling required.
Leave Room for Expansion
One of the biggest advantages of installing an Ethernet switch is that it gives your network room to grow.
Think about devices you may add in the future, such as:
- A second gaming console
- Another desktop computer
- Network Attached Storage (NAS)
- Smart TVs
- WiFi access points
- Security cameras
- Home automation hubs
Choosing a good location today can save you from relocating your networking equipment later.
Step 2: Make Sure Your Router Has an Available LAN Port
An Ethernet switch connects to your router, not directly to your modem or fiber ONT.
Most home routers include several LAN (Local Area Network) ports on the back.
These ports are designed for devices inside your home network.
Before installing your switch, confirm that one LAN port is available.
If all LAN ports are already in use, simply unplug one wired device, connect the switch to that LAN port instead, and reconnect the device to the switch. You won’t lose a connection—you’ll actually gain additional Ethernet ports.
Don’t Use the WAN Port
One of the most common installation mistakes is connecting the Ethernet switch to the router’s WAN (Internet) port.
The WAN port is reserved for the connection between your router and your modem or fiber ONT.
Your Ethernet switch should always connect to one of the router’s LAN ports.
If you’re unsure which port is which, your router’s ports are usually labeled directly above or below each connector.
Connecting an Ethernet switch to the WAN port prevents the switch from becoming part of your home network because it sits outside the router rather than behind it.
A helpful way to think about it is this:
- The modem or ONT connects your home to your Internet Service Provider.
- The router manages your home network.
- The Ethernet switch expands the router by adding additional wired connections.
Each device has a different job, and they work together in a specific order.
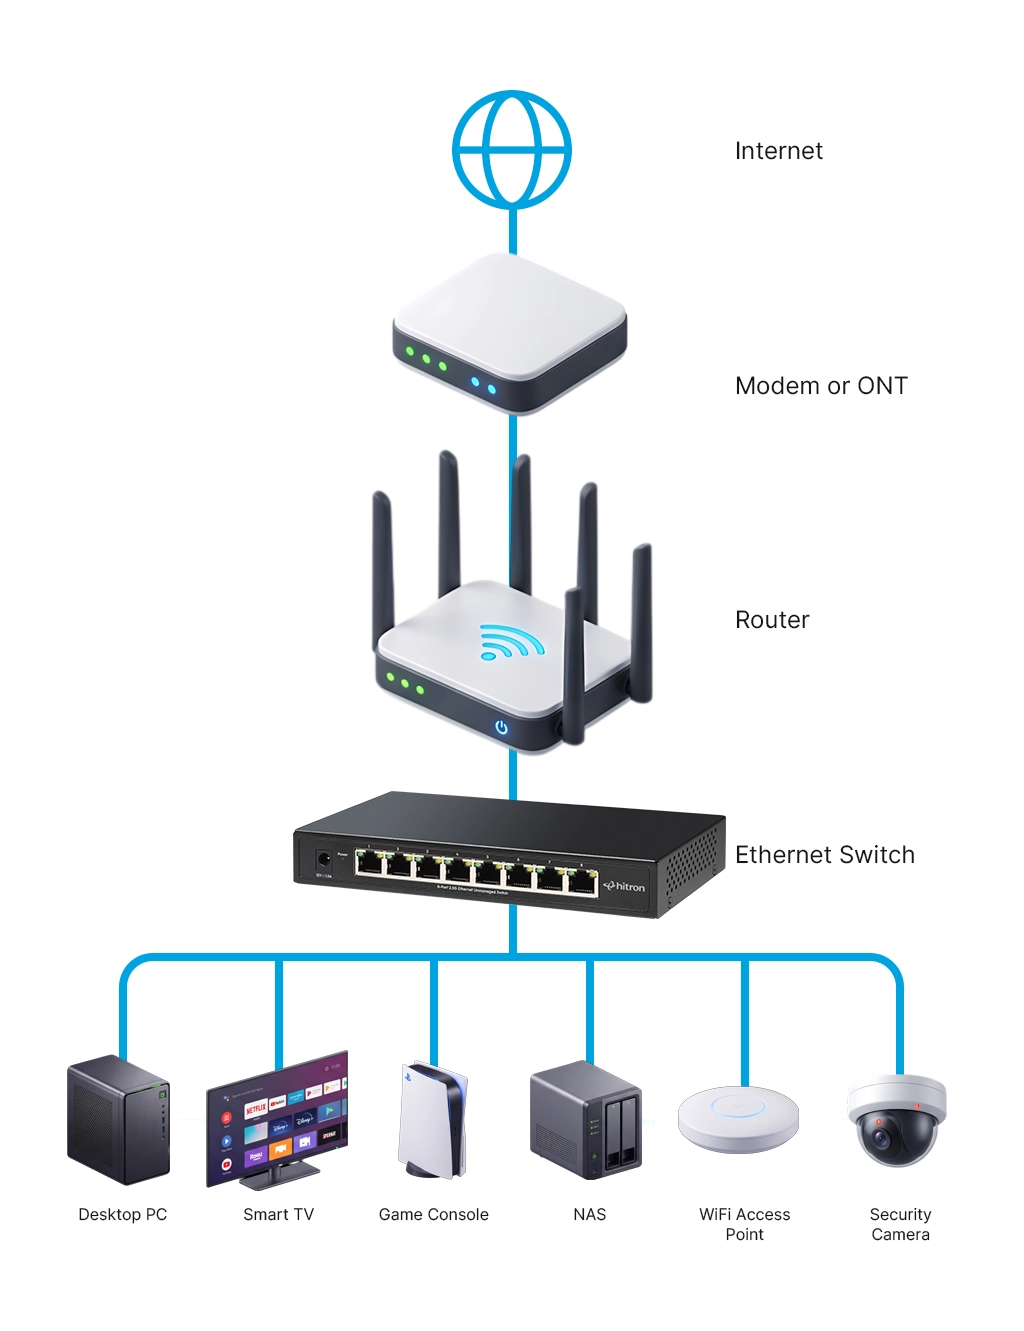
👉 Read: What Is an ONT and How Does It Work? explains how fibre Internet enters your home and how the ONT, router, and Ethernet switch work together to create a complete home network.
Step 3: Choose the Right Ethernet Cable
The Ethernet cable connecting your router to your switch becomes the backbone of every wired connection attached to that switch.
For most homeowners, Cat5e or Cat6 cables provide excellent performance.
Cable
Typical Maximum Speed
Recommended For
If you’re installing a 2.5 Gigabit Ethernet switch, such as the Hitron APEX2005 or APEX2008, quality Cat5e cables often support full 2.5 Gigabit performance over normal residential distances. Cat6 offers additional headroom for future upgrades.
If you’re installing new Ethernet cable inside walls, Cat6 is often worth considering because it offers greater headroom for future network upgrades with only a modest increase in cost.
Just as importantly, inspect your existing cables.
A damaged Ethernet cable, poorly crimped connector, or cable that’s been sharply bent or pinched can reduce performance or prevent a reliable connection altogether. Before troubleshooting your switch, always confirm the cable itself is in good condition.
Step 4: Decide How Many Ports You’ll Need
Many homeowners buy an Ethernet switch based only on the number of devices they own today.
In reality, it’s often better to think about the network you’ll have two or three years from now.
A typical home network that begins with just a few wired devices often grows surprisingly quickly.
Today’s devices may include:
- Desktop computer
- Gaming console
- Smart TV
Later, you may decide to add:
- Network Attached Storage (NAS)
- Additional gaming consoles
- Work-from-home equipment
- WiFi access points
- Smart home hubs
- Security cameras
- A network printer
- A PoE switch to power future devices
Note: Remember that one Ethernet port is used to connect the switch back to your router.
That means the number of available device ports is slightly less than the advertised port count.
Ethernet Switch
Total Ports
Ports Available for Devices
While a five-port switch is ideal for many smaller installations, an eight-port model often provides enough additional capacity to support future devices without requiring another upgrade.
If you’re unsure which switch is best for your home, our guide How to Choose the Right Ethernet Switch for Your Network explains how to compare switch sizes, Ethernet speeds, and features based on your current and future networking needs.
Equipment Checklist:
Most unmanaged Ethernet switches are designed to be installed with only a few basic components.
Required:
- Ethernet switch
- Router
- Power adapter supplied with the switch
- One Ethernet cable to connect the router and switch
- One Ethernet cable for each wired device
Helpful Accessories:
Depending on your installation, you may also want:
- Cable labels
- Velcro cable ties
- Cable management clips
- Surge protector
- UPS (Uninterruptible Power Supply)
Although optional, organizing cables during installation makes future troubleshooting and expansion significantly easier, especially as more devices are added over time.
Ethernet Switch Installation Steps:
Most unmanaged Ethernet switches are designed to be completely plug-and-play. Unlike many other networking devices, they don’t require software installation, firmware configuration, or a setup wizard before they can be used.
As soon as the switch detects a connection to your router and your connected devices, it automatically begins building a table of connected devices (called a MAC address table) and intelligently forwards network traffic only where it’s needed.
Step 1: Connect the Ethernet Switch to Power
Begin by connecting the supplied power adapter to the Ethernet switch and plugging it into a nearby electrical outlet.
Most Ethernet switches begin their start-up sequence immediately.
During start-up you may notice:
- The Power LED illuminates.
- Some or all port LEDs briefly flash.
- The LEDs settle into their normal operating state after a few seconds.
This brief start-up process is the switch performing an internal self-test to verify that its hardware is functioning correctly.
Once the Power LED remains steady, the switch is ready to be connected to your network.
💡 Tip: If you’re installing several pieces of networking equipment together, consider plugging your modem, router, and Ethernet switch into the same surge protector or UPS (Uninterruptible Power Supply). This protects your equipment from power fluctuations and keeps your home network running during short power interruptions.
Step 2: Connect the Ethernet Switch to Your Router
Next, connect an Ethernet cable between one of your router’s LAN ports and any available port on the Ethernet switch.
Many people are surprised to learn that modern unmanaged Ethernet switches do not have a dedicated “Router” or “Input” port.
Instead, technologies such as Auto MDI-X automatically detect the connected device and configure the connection for you.
In other words, whichever port you choose becomes the connection back to your router.
This is one of the reasons unmanaged switches are so easy to install compared to older networking equipment.
What Happens After You Connect the Router?
Although nothing appears to happen beyond a few blinking lights, several important processes begin immediately.
The Ethernet switch automatically:
- Detects that a network device has been connected.
- Negotiates the fastest Ethernet speed supported by both devices.
- Determines whether the connection should operate in full-duplex mode.
- Begins learning which devices are connected to each port.
- Starts forwarding network traffic only to the correct destination.
All of this happens automatically without any user intervention.
This “self-configuring” behaviour is what makes unmanaged Ethernet switches an excellent choice for most home networks.
Step 3: Connect Your Wired Devices
Now connect each wired device to one of the remaining Ethernet ports on the switch.
Common devices include:
- Desktop computers
- Gaming consoles
- Smart TVs
- Streaming devices
- Network Attached Storage (NAS)
- Home office docking stations
- Network printers
- WiFi access points
- Smart home hubs
Each device receives its own dedicated Ethernet connection through the switch.
Unlike an older Ethernet hub, which broadcasts traffic to every connected device, an Ethernet switch sends data only to the device requesting it. This reduces unnecessary network traffic and allows multiple devices to communicate at the same time.
Does It Matter Which Port You Use?
For almost every unmanaged Ethernet switch, the answer is no.
Any Ethernet port can typically be used for:
- Connecting your router
- Connecting a desktop computer
- Connecting a gaming console
- Connecting another Ethernet switch
- Connecting a WiFi access point
The switch automatically determines what is connected and configures the connection accordingly.
This flexibility makes expanding your home network much easier than many people expect.
Understanding the LED Indicator Lights
One of the easiest ways to verify your installation is by checking the indicator lights on the front of the switch.
Although LED colours and behaviour vary slightly between manufacturers, they generally provide valuable information about the health of your network.
Power LED
The Power LED confirms that the switch is receiving power.
Status
Meaning
If the Power LED does not illuminate, first verify the power adapter is securely connected and the electrical outlet is functioning correctly.
Each Ethernet port usually includes one or two small LEDs.
These indicate whether a physical Ethernet connection has been established.
Typical behaviour includes:
LED Status
Meaning
On some switches, different LED colours may indicate different connection speeds.
For example:
- Green = Multi-Gig or Gigabit connection
- Amber = 100 Mbps connection
Refer to your switch’s documentation if your model uses colour-coded indicators.
How to Verify Your Installation Is Working
Once all cables have been connected, verify that each device has successfully joined your home network.
A few quick checks can confirm everything is operating as expected.
1. Check Internet Access
On each connected device:
- Open a web browser.
- Visit several websites.
- Confirm pages load normally.
If every connected device can access the Internet, the basic installation is complete.
2. Verify Link Lights
Look at each Ethernet port.
Every connected device should have an illuminated Link LED.
If one port remains dark while others are active, the issue is often:
- Loose Ethernet cable
- Damaged cable
- Device powered off
- Faulty network adapter
Checking the LEDs is usually much faster than beginning software troubleshooting.
3. Confirm Devices Receive an IP Address
Your router automatically assigns an IP address to each connected device using DHCP.
In most cases this happens within a few seconds.
If a device reports “No Internet” or “Network Unavailable,” disconnect and reconnect the Ethernet cable, then restart the device if necessary.
If multiple devices fail to receive an IP address, the issue is more likely related to the router than the Ethernet switch.
4. Run an Internet Speed Test
Finally, perform a speed test on a wired device.
This confirms:
- Internet connectivity
- Proper Ethernet link
- Router communication
- Overall installation success
Remember that the speed you achieve is limited by:
- Your Internet plan
- Your modem or ONT
- Your router
- Your computer’s network adapter
The Ethernet switch itself does not increase your Internet speed—it simply allows more wired devices to access your network efficiently.
Common Installation Mistakes to Avoid
Most Ethernet switch installations work the first time.
When problems occur, they’re usually caused by one of a handful of simple installation mistakes.
Avoiding these issues can save significant troubleshooting time:
1. Connecting the Switch to the Wrong Port
Always connect the Ethernet switch to one of your router’s LAN ports.
Connecting it to the WAN port prevents the switch from becoming part of your home network.
2. Using a Faulty Ethernet Cable
A damaged cable can prevent devices from connecting or limit them to slower Ethernet speeds.
If a device isn’t detected, try replacing the Ethernet cable before assuming the switch is faulty.
3. Installing the Switch Inside an Unventilated Cabinet
Networking equipment generates heat during normal operation.
Installing the switch inside a tightly enclosed cabinet with little airflow can reduce long-term reliability.
Whenever possible, allow several inches of space around the switch for ventilation.
4. Filling Every Available Port Immediately
If every Ethernet port is occupied on day one, future upgrades become more difficult.
If you expect your home network to continue growing, leaving one or two spare ports available can make adding new devices much simpler.
5. Assuming Every Problem Is the Switch
Because Ethernet switches require almost no configuration, they’re often blamed when another device is actually causing the issue.
In practice, problems are more commonly caused by:
- Damaged Ethernet cables
- Incorrect router connections
- Faulty network adapters
- Router configuration issues
- Internet service interruptions
Understanding where the problem originates can significantly reduce troubleshooting time.
Troubleshooting Common Ethernet Switch Problems
Most unmanaged Ethernet switches begin working as soon as they’re connected. If something isn’t working correctly, the cause is usually elsewhere in the network.
Rather than replacing the switch immediately, work through the following checks. In many cases, the solution is as simple as reconnecting a cable or identifying a device that’s connected to the wrong port.
My Ethernet Switch Has Power, but None of My Devices Can Connect
If the Power LED is illuminated but none of your devices can access your network, verify the connection between your router and the switch.
Ask yourself:
- Is the Ethernet cable connected to one of the router’s LAN ports?
- Is the cable firmly connected at both ends?
- Are the Link LEDs illuminated on both the router and the switch?
- Does the Ethernet cable work if connected directly between the router and a computer?
If the router connection is working correctly, restart the router and allow it to complete its start-up process before reconnecting the switch.
One Device Works, but Another Doesn’t
When only one device is having trouble, the Ethernet switch is rarely the cause.
Instead, check:
- The Ethernet cable connected to that device.
- Whether the device’s network adapter is enabled.
- Whether the device is configured to obtain an IP address automatically.
- Whether another Ethernet port on the switch produces the same result.
Swapping the Ethernet cable with one from a working device is often the quickest way to identify whether the problem is the cable or the device itself.
My Device Is Connected, but the Internet Is Slow
A slow wired connection can have several causes that have nothing to do with the Ethernet switch.
Consider:
- An older Ethernet cable that doesn’t support higher speeds.
- A network adapter that’s limited to Fast Ethernet (100 Mbps).
- An older router.
- An Internet plan that’s slower than expected.
- Heavy Internet usage elsewhere in the home.
It’s also worth remembering that Internet speed and local network speed are different.
For example, two computers connected to a 2.5 Gigabit Ethernet switch can transfer files between each other much faster than your Internet connection if your ISP plan is only 500 Mbps.
My Smart TV or Gaming Console Doesn’t Detect Ethernet
Many entertainment devices automatically switch to Ethernet when a cable is connected.
If yours doesn’t:
- Restart the device after connecting the cable.
- Check the network settings menu.
- Verify the Ethernet cable works with another device.
- Confirm the Link LED is illuminated on the switch.
Some smart TVs also allow WiFi and Ethernet to be configured separately. Reviewing the network settings usually resolves the issue.
My Ethernet Switch Is Full. What Should I Do?
As home networks grow, it’s common to run out of available Ethernet ports.
Fortunately, you have several options.
Upgrade to a Larger Switch – If you’re consistently using every port, replacing a smaller switch with an 8-port or 16-port model may be the simplest solution.
Add a Second Ethernet Switch – Modern unmanaged Ethernet switches can be connected together to provide additional ports.
For example:
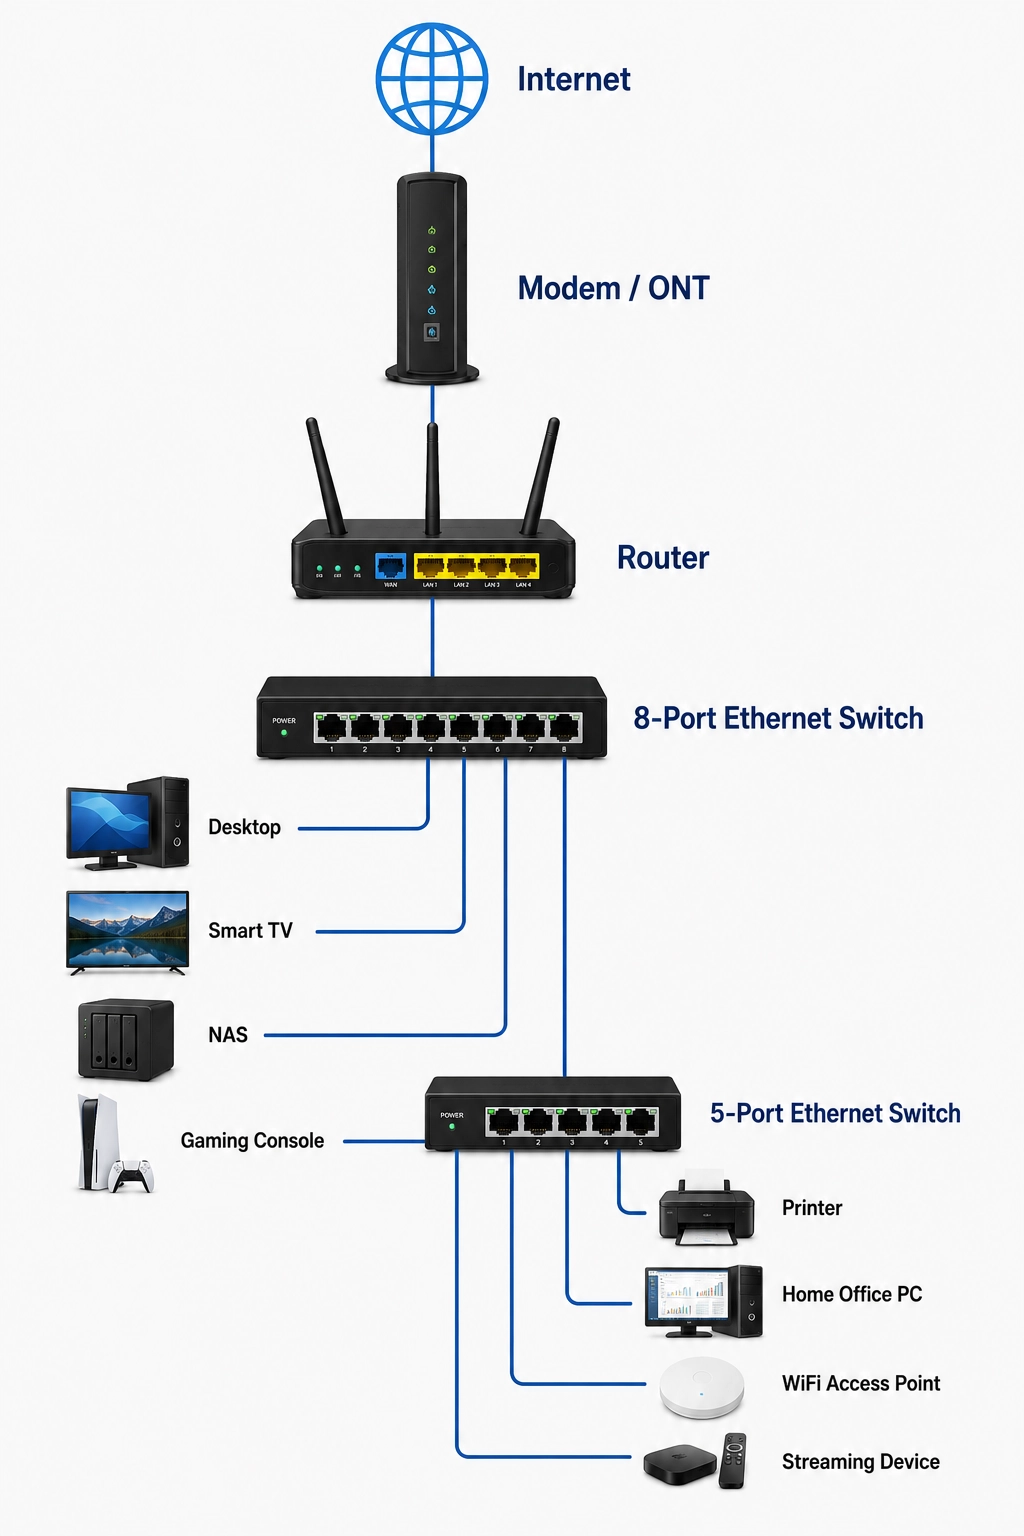
For most homes, connecting one unmanaged switch to another works seamlessly without requiring any additional configuration.
Install a Switch in Another Room – If several devices are located together in another part of your home, installing a second switch in that room may be more practical than running multiple Ethernet cables back to your primary switch.
This is particularly common for:
- Home offices
- Entertainment rooms
- Finished basements
- Workshops
- Detached garages
Can I Install an Ethernet Switch Upstairs or in Another Room?
Yes.
An Ethernet switch can be installed anywhere an Ethernet connection is available.
In many homes, a single Ethernet cable runs from the router to another room, where a second switch provides additional wired connections for local devices.
If Ethernet cabling isn’t already available between rooms, there are still options.
Expanding Your Home Network Beyond an Ethernet Switch
For many homeowners, installing an Ethernet switch is the first step toward building a faster, more capable home network.
As your needs grow, you may also choose to add:
Additional WiFi Access Points
If WiFi coverage is poor in parts of your home, Ethernet provides an ideal wired backhaul for additional access points.
Unlike wireless repeaters, wired access points don’t consume wireless bandwidth communicating with each other.
Network Attached Storage (NAS)
A NAS allows multiple devices in your home to access shared files, backups, photos, and media libraries.
Connecting a NAS directly to your Ethernet switch often provides much faster file transfers than using WiFi.
Power over Ethernet (PoE)
If you’re planning to install devices such as:
- Security cameras
- WiFi access points
- VoIP phones
- Video door systems
a PoE switch can provide both power and data through a single Ethernet cable.
Multi-Gig Home Networking
As Internet plans continue to increase in speed, more homeowners are adopting Multi-Gig networking.
A 2.5 Gigabit Ethernet switch can help ensure that compatible computers, NAS devices, and local file transfers benefit from higher network speeds—not just Internet downloads.
FAQs
Can I install an Ethernet switch without turning off my router?
Can I connect two Ethernet switches together?
Does it matter which port I use on the switch?
Will installing an Ethernet switch make my Internet faster?
An Ethernet switch won’t increase the speed of your Internet plan.
However, it can improve how your home network uses your available bandwidth by adding more wired connections and reducing dependence on WiFi.
Can I use an Ethernet switch with fibre Internet?
Can I install an Ethernet switch behind my TV?
Does an Ethernet switch need software?
How long does it take to install an Ethernet switch?
Choosing the Right Ethernet Switch
Once you’ve decided to expand your home network, selecting the right switch depends primarily on how many devices you plan to connect and whether those devices require electrical power over Ethernet.
Choose an Unmanaged Ethernet Switch When You Need More Wired Connections
Hitron’s unmanaged Ethernet switches are designed for plug-and-play installation, making them ideal for homeowners who simply want to add more Ethernet ports without configuring network settings.
- APEX2005 – Five total ports, ideal for smaller home offices, entertainment centres, or gaming setups.
- APEX2008 – Eight total ports, providing additional capacity for growing home networks and future expansion.