Firmware 2.0.0.1 Update
How to Upgrade Hitron HT-EM2 Firmware
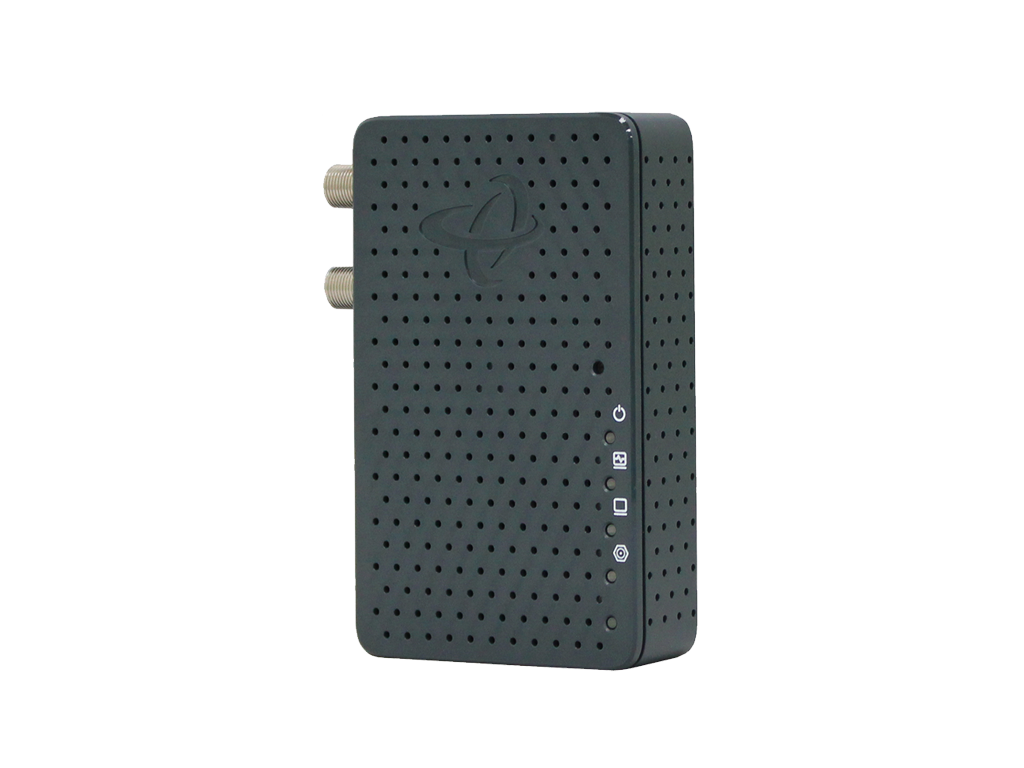
Step 1: Connect the HT-EM2 Adapter to a Windows PC
To begin, disconnect all cables (coax, ethernet, power) from the HT-EM2 adapter. Using an Ethernet cable, plug one end of the Ethernet cable into the adapter and the other end into a Windows PC. Power on the adapter by plugging in the power supply provided.
Step 2: Adjust Windows PC Network Settings
On your Windows PC, you will need to change some network settings so that you can connect to the web interface on the adapter. To do this, open Control Panel and click on Network and Sharing Center. Make sure you change from Category view to Small or Large icons.
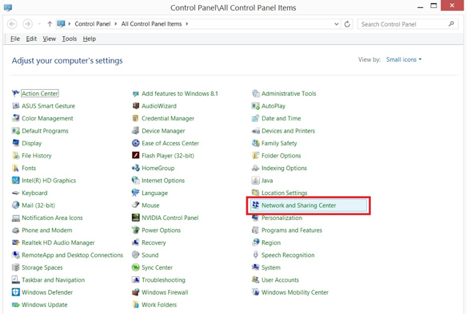
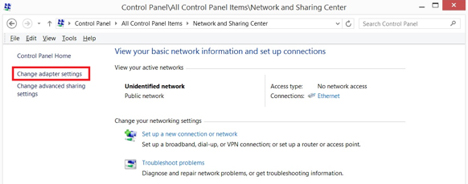
Click on Change Adapter Settings in the left-hand side menu.
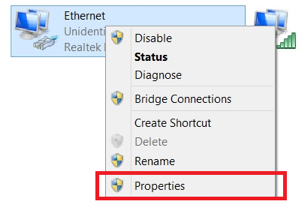
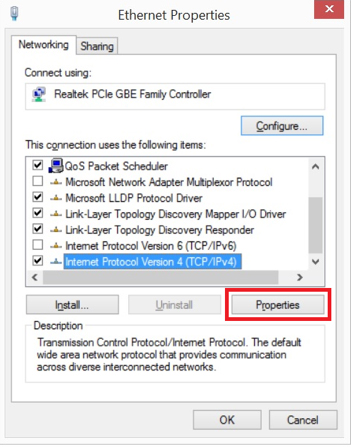
Right-click on Ethernet or Local Area Connection and choose Properties.
Select Internet Protocol Version 4 (TCP/IPv4) from the list and then click on the Properties button
Select the Use the following IP address radio button and type in the following numbers as shown below. For the IP address, I chose 192.168.144.2, but you can choose anything for the last number as long as it does not end with .20. For Subnet Mask, use 255.255.255.0.
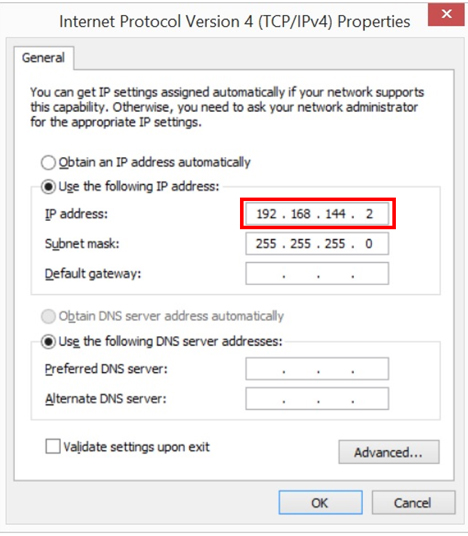
You do not have to enter any numbers for Default Gateway or the DNS servers. Click OK and then OK again to get back to the Control Panel.
Step 3: Log into the HTEM2 Adapter
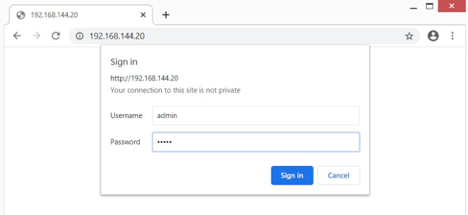
Now open a web browser and type in the following IP address in the URL bar: 192.168.144.20.

A pop-up will appear prompting you to sign in. Enter admin for the Username and admin for the Password.
Step 4: Upgrade to Firmware 2.0.0.1
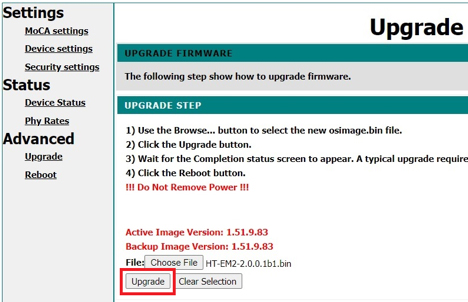
You should see a Hitron webpage with info about the adapter. Click on the Upgrade link on the left-hand side menu under Advanced. This page will display the Active Image Version. The latest firmware version is 2.0.0.1. If the active image shown is older than 2.0.0.1, you will need to download the 2.0.0.1 firmware from the link below and save it somewhere on your Windows PC.

Once you have downloaded the 2.0.0.1 firmware, click on Choose File. Locate and select the 2.0.0.1 firmware .bin file that you just downloaded. If done correctly, you will see the firmware filename on the right side of the Choose File button.
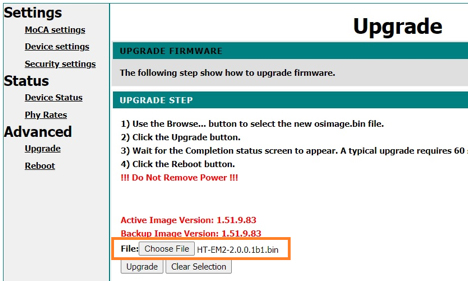
Click on the Upgrade button to begin upgrading the firmware. You will get a pop-up asking you to confirm the upgrade. Click OK.

In about 60 seconds, the HT-EM2 adapter should have completed the upgrade process, and you will be taken back to the web interface page. If it does not, go ahead and refresh/reload the browser page. You should now see that the Active Image Version should display the new 2.0.0.1 firmware version.
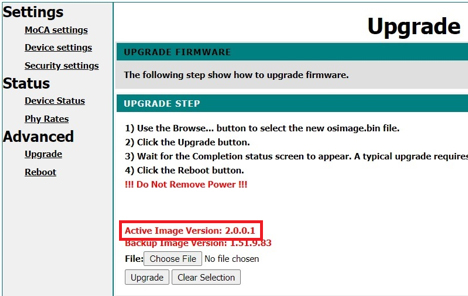
Final Step: Reboot and Reconnect
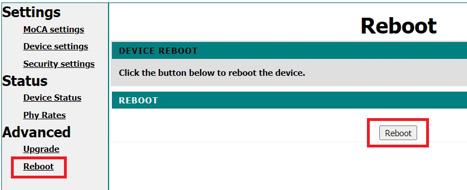
The upgrade was successful. All that remains is to reboot the adapter. Click on Reboot on the left-hand side menu. Click Reboot. You will get a pop-up message asking you to confirm the reboot. Click OK.

You can now change your Windows PC networking back to its original settings ‘Obtain an IP address automatically’ and connect the coax cable back to the HT-EM2 adapter.